First of all, we realized that the data obtained from a casing wear test did not represent a single property of any one of the three elements (casing, tool joint, drilling fluid) of the casing wear system being tested.
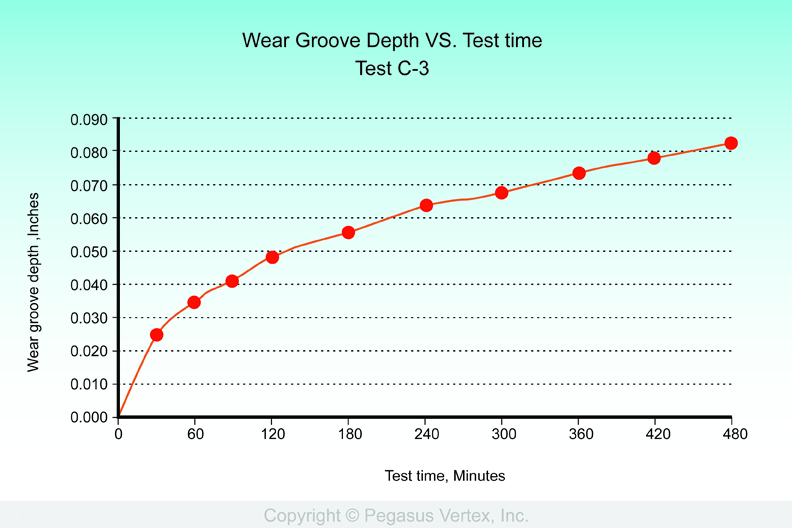
The curve of ‘wear groove depth’ vs. ‘test time’, such as that shown in Figure 1, shows the performance of the entire casing wear system under the operating conditions of the test.
Next, we learned that casing grade, such as K-55, N-80, C-95, was not a good indicator of wear properties. Wear factors for various samples of N-80 casing were uncertain to ± 50%. Often there would be a significant difference in the wear factors obtained from casing samples cut from opposite ends of a 40 foot casing joint. Later tests showed a remarkable lack of correlation between wear factor and just about everything else associated with the composition of the casing alloy.
Every casing wear system should be regarded as unique and individual, and probably not related to any other casing wear system.
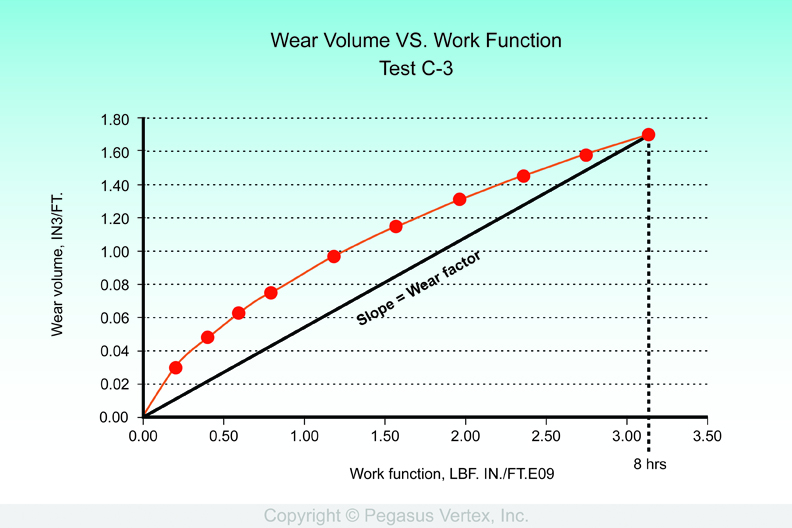
The Maurer ‘Wear Factor’, shown in Figure 2, has been shown to predict the performance of casing wear systems encountered in drilling operations with an uncertainty that is consistent with the uncertainty of the field measurements.
What is important in estimating casing wear to be expected during drilling operations is whether the casing wear factor will be 0.2 (oil based mud), 1.0 (some of the new hardbanding alloys), 5 to 8 (unprotected tool joints), or as high as 50 or 70 (X-80 as used in riser pipes).
Remember that we said that casing grade was no indicator of casing wear rate? I make an exception for X-80, a line pipe, often used as the basis for 21 inch riser pipes. At first, we didn’t believe our own results, but, yes, it was true. This explains the severity of riser wear adjacent to the flex joint at the wellhead.
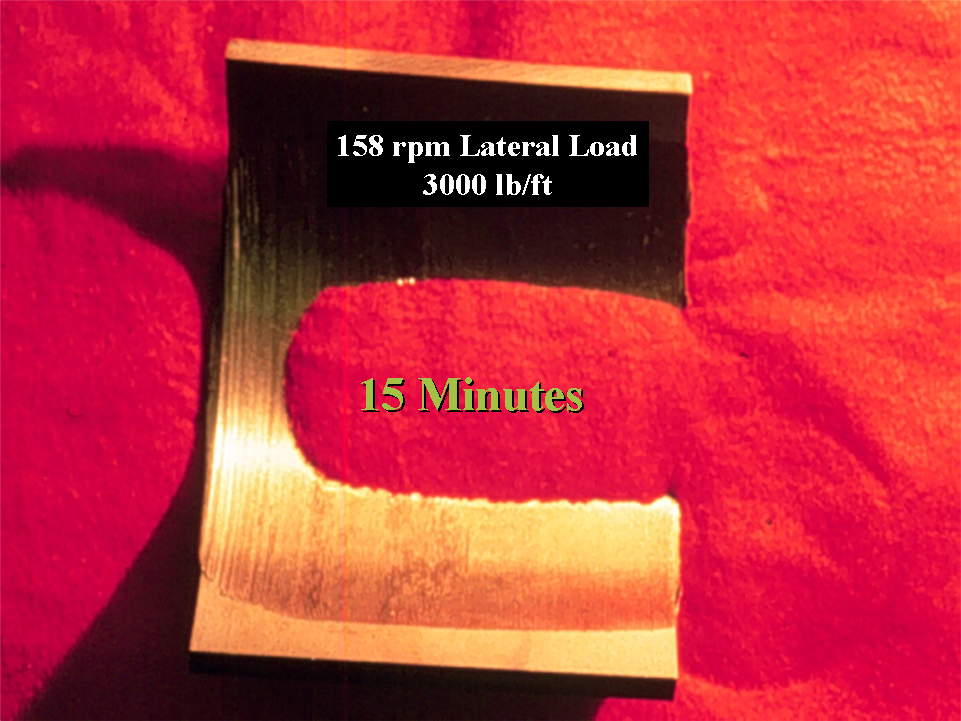
The result of extremely high casing wear rate is shown in Figure 3. The tool joint was hardbanded with rough tungsten carbide, as shown in Figure 1 of Casing Wear Series – 1: How we got here?.
This is why rough, field applied Tungsten Carbide has largely been abandoned as a means to protect tool joints during drilling operations. It does protect the tool joints, but is a bit hard on the casing.


