Prologue
Mr. Gefei Liu, president of Pegasus Vertex, Inc. (PVI), suggested that I write a series of short articles to discuss the empirical science of casing and riser wear. PVI incorporates this technology in their computer program – ‘CWPRO’. This program applies wear technology to predict casing and riser wear to be expected during drilling operations.
The observations and opinions expressed in these articles are based on my 20-year association with the subject of casing and riser wear. Much of this time was spent at Maurer Engineering, under the direction of Dr. W. C. Maurer. Much of the advances in the subject were the direct result of Dr. Maurer’s phenomenal knowledge of and insight into the technical challenges that were encountered during the development and application of casing and riser wear technology.
In the beginning
Casing wear was not recognized as a problem until the early 1960s. Vertical wells were being drilled deeper, and directional wells were being pushed out further. This required longer drilling times, and resulted in much greater exposure of the inner wall of the intermediate casing to the rotating tool joints of the drill string. Wear grooves appeared in the intermediate casing and progressed from noticeable to serious.
Up to this time, tool joint wear was the only wear problem being treated.
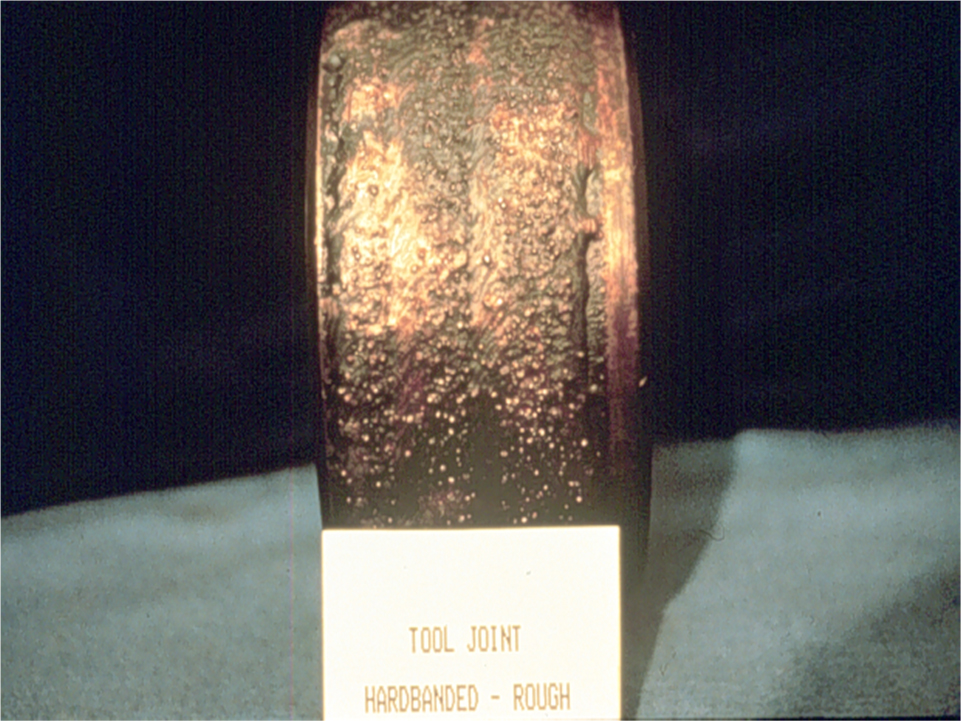
The universally accepted treatment to prevent tool joint wear was to coat the tool joints with an alloy containing tungsten carbide particles. This protected the tool joints, but was proving to be a bit hard on the intermediate casings.
The tungsten carbide coated tool joints were efficiently machining wear grooves into the inner walls of the intermediate casings. As these wear grooves deepened, they would seriously reduce the pressure capacities (burst & collapse), sometimes resulting in catastrophic failure.
These early findings resulted in the establishment of two distinct, but related, developments.
1. Experimental studies of casing wear; and
2. The development of casing-friendly tool joint coatings that would also protect the tool joints.
First of all, what are the basic elements of casing wear?
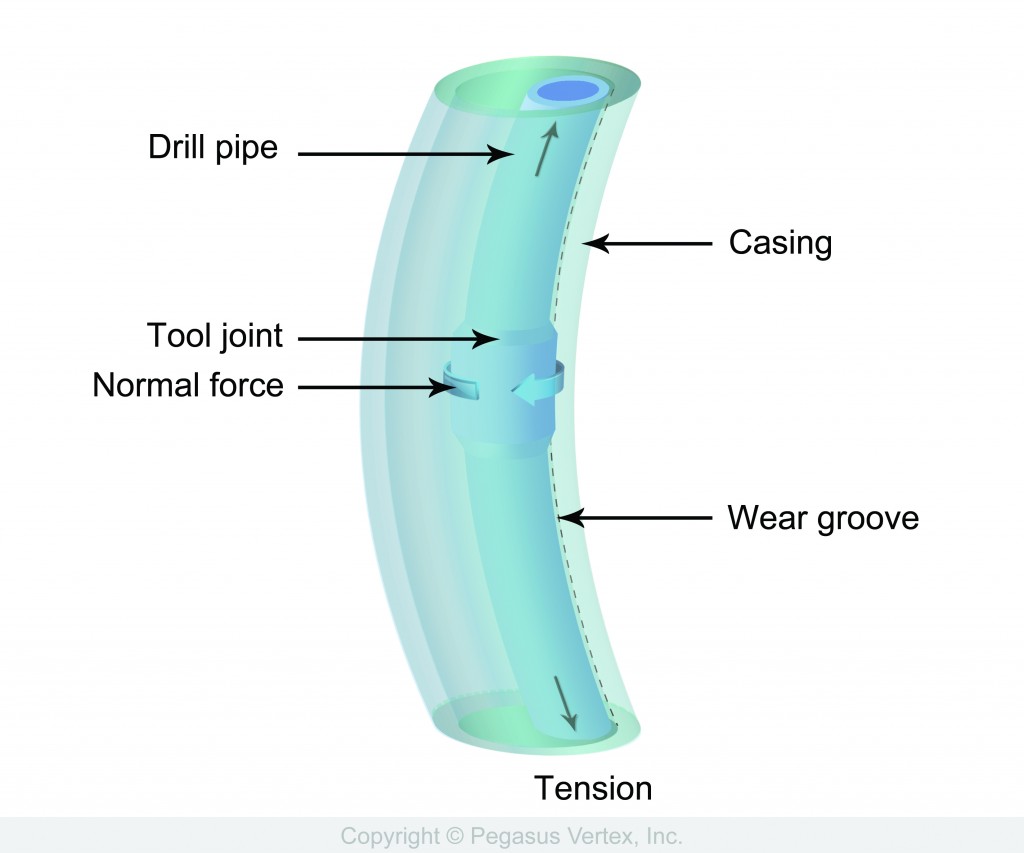
If boreholes were straight, casing wear would be much less of a problem. But, boreholes are not straight. As shown in Figure 3, tension in the drillstring pulls the rotating tool joints into the convex sides of the curved borehole. Since the tension in the drillstring may be several hundred thousand pounds force, the lateral loads forcing the tool joints into the convex wall of the intermediate casing may be several thousands of pounds force. The greater the curvature of the borehole, measured as `dogleg severity’, the greater will be the lateral load pushing the drill string into the intermediate casing wall. ‘Dogleg Severity (DLS)’, which is measured in degrees per 100 feet, can run as high as 5 deg/100 ft. or worse.
Drilling fluid which transports drill cuttings to the surface, flows past the tool joint/casing contact, and provides the abrasive needed to grind a wear groove into the inner wall of the intermediate casing.
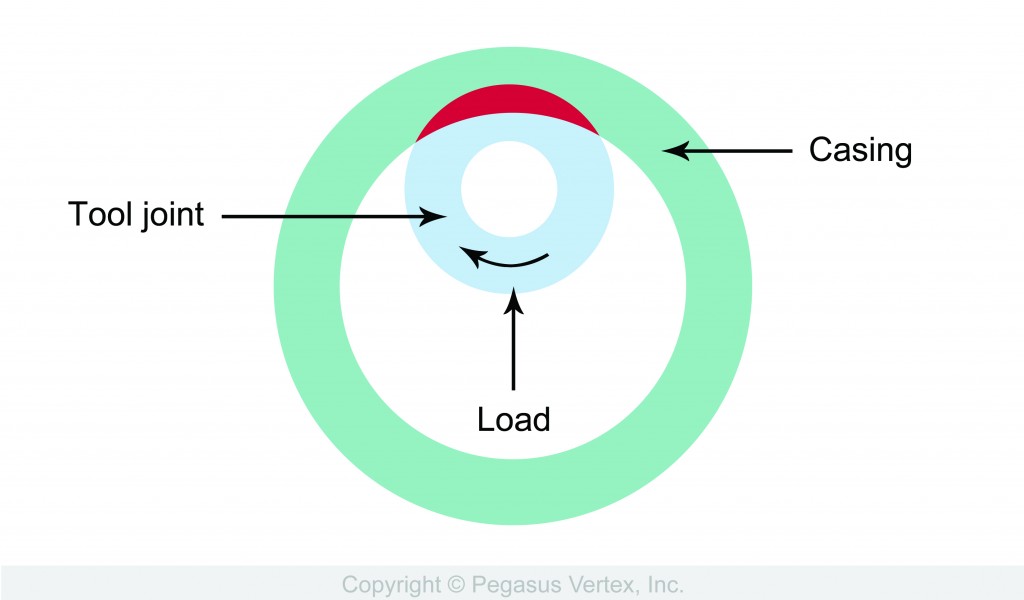
Casing wear at a dogleg is shown in Figure 3, and a schematic of the resulting casing wear groove is shown in Figure 4.
The existence of the casing wear grooves indicates that there are many locations where epicyclic drillstring vibrations do not occur.


